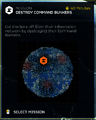
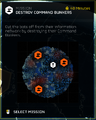
Destroy Command Bunkers
“We have identified a number of heavily-guarded bunkers in this region. We suspect they contain Command Nodes central to linking in to the Automaton Transmission Stream.
Destroy the bunkers, and cut the bots off from the flow of information.— Galactic War Terminal Description
The Destroy Command Bunkers is a Main Objective.
Objective Steps
“This heavily-guarded bunker is thought to contain a vital Command Node for the Automaton Transmission Stream
— Galactic War Terminal Description
Tactical Information
The bunker is armed with laser cannons and protected by Automaton units, including small pockets in emplacements further from the main structure. It can be destroyed with a NUX-223 Hellbomb or numerous combinations of stratagems. An Orbital Laser is extremely effective, as is a combination of an Orbital 380mm HE Barrage and an Orbital 120mm HE Barrage. An Eagle 500kg Bomb will destroy the bunker's turrets but two will not destroy the bunker itself.
Suicide Mission Difficulty

Impossible Difficulty
Helldive Difficulty


Change History
- Fix: Fixed incorrect collision being left over after destroying Automaton bunkers with hellbombs.
- Now has more objective locations, the mission was too easy before compared to other missions.
- It can now appear in operations from difficulty 5.