User:Iridar/Warbond Rundown
Warbond Rundown
This is an overview of all currently available warbonds from an experienced helldiver. The purpose of this article is to quickly go over equipment contained within each warbond to help players decide which warbond they should unlock next, and to help keep tabs on the meta. Note that I will be reviewing only gameplay-altering items, and ignore cosmetic items, such as titles, emotes and color schemes.
I intend to keep this article updated for the foreseeable future.
Item Grades
Except for armors, each item is assigned a tier:
- F - awful, should not be used ever for any reason
- D - has extremely situational uses
- C - has average performance - this is where I put starting equipment like Liberator and Peacemaker
- B - usable, but with notable downsides
- A - good, but not quite good enough for meta loadouts
- S - excellent, one of the best items in the game, used in meta loadouts
Some items are also given a + or a - if I feel they are a little bit better or worse than other items in this tier on average.
Grading system for armors
+1 point for each armor that has a combination of Armor Rating and Armor Passive that is not available to helldivers without spending Super Credits.
Starting Loadout
| Image | Item | Description | Grade | Comment |
|---|---|---|---|---|
| Liberator | Your basic assault rifle with light armor penetration. Remains very accurate even when fired at full-auto and deals good damage, as long as it doesn't have to go against medium armor, which just makes all shots harmlessly bounce off. | C+ | Remains serviceable against bugs even at highest difficulty, but against bots you will want something more specialized. | |
| Peacemaker | Spammable and reasonably accurate semi-auto pistol with light armor penetration. | C- | Mostly useful only against low-tier enemies. | |
| High Explosive Grenade | Your generic grenade with the detonation delay of a few seconds and heavy armor penetration, which allows it to damage Hulks, Chargers and all smaller enemies. Deals a lot of raw explosive damage in a relatively small area. | C | The detonation delay makes it safe to use, but also tricky to hit specific enemies with, unless you cook the grenade, which can be dangerous - you risk blowing yourself up if you get ragdolled while cooking. | |
| B-01 Tactical Armor | 100 armor rating with Extra Padding - increases Armor Rating by 50, reducing all incoming damage. | N/A | Good armor. It effectively gives you armor rating of heavy armor with mobility of medium armor. |
Helldivers Mobilize
This is the "free" warbond.
| Image | Page 1 - Item | Description | Grade | Comment |
|---|---|---|---|---|
| Frag Grenade | Deals less raw explosive damage explosion than your starting HE grenade, and has only medium armor penetration, but with a bigger explosion radius. It also launches medium armor penetrating shrapnel, which in theory should give it larger lethal radius against low-tier enemies. You also get to carry one extra grenade. Has shorter fuse. | D | Rarely used. Increased radius is not worth losing on explosive damage and penetration. Shrapnel is nice, but in practice if you throw a Frag into a crowd of enemies, most of the shrapnel will be absorbed by the few closest enemies, overkilling them. One niche use for Frags is leveraging the extra grenade capacity for dealing with bug holes and bot Fabricators, but there are many other ways to deal with them, and there are better grenades for thinning out tight crowds. | |
| Punisher | A pump action shotgun with light armor penetration that deals high damage per shot and applies heavy stagger on hit. Uses rounds reload: each shell must be loaded manually, as opposed to replacing the entire magazine. Effective range limited by relatively wide pellet spread. | B-- | Rounds reload is great in close quarters, allowing you to interrupt reloads by diving or shooting without wasting time or ammunition. Kills low-tier bugs easily, but tends to run out of ammo if used as a horde thinner, and struggles to kill mid-tier bugs quickly due to low penetration. Not really used against bots, though it does make you untouchable to any number of Berserkers. | |
| Infiltrator Body Armor | 70 armor rating with Scout - reduces range at which enemies can detect the wearer and makes map markers scan for enemies. | N/A | Generally useless outside of very specific solo stealthy playstyles. | |
| Image | Page 2 - Item | Description | Grade | Comment |
| Redeemer | Autopistol with light armor penetration and crazy high rate of fire. Extremely effective in close quarters, but poor accuracy limits effective range. | A | Excellent sidearm for self-defense in hectic close quarters situations. Mostly held back by having only light armor penetration, otherwise a great weapon. | |
| Diligence | Semi-auto marksman rifle with light armor penetration. Accurate and spammable. Oneshots Devastators on headshots. | B | Good weapon against bots until you unlock Diligence Counter-Sniper, which does the same thing better. | |
| Marksman Body Armor | 150 armor rating with Fortified - reduces weapon recoil and incoming damage from explosives and bug spewing attacks. | N/A | Good passive for bot missions. | |
| Image | Page 3 - Item | Description | Grade | Comment |
| Defender | SMG with light armor penetration, low recoil, low rate of fire and good hip fire accuracy. Can be used one-handed, which means it can be fired behind you while you're running away, as well as while using a Ballistic Shield or carrying an objective item. | C- | A sidegrade to Liberator, trades effective range and DPS for mobility and utility. Being able to shoot behind yourself while being chased by a group of bugs or Berserkers can be useful, but this playstyle is held back by low damage and poor accuracy, and kiting enemies for too long risks running into patrols, and isn't always possible. Doesn't have enough power and penetration to kill most enemies with body shots, so you almost never want to go full auto. Instead, burst fire while aiming for weakpoints. | |
| Trench Engineer Armor | 100 armor rating with Engineering Kit - reduces weapon recoil and increases grenade carrying capacity. | N/A | Top passive for bug missions, though you can get away with lower armor rating. | |
| Booster: Hellpod Space Optimization | Allows helldivers to deploy fully stocked on ammo, stims and grenades. | S | Top booster for all missions and all difficulties: it makes dying less impactful on squad's supplies. Technically, it's near-useless if nobody ever dies, so it mostly provides insurance rather than a direct advantage. | |
| Image | Page 4 - Item | Description | Grade | Comment |
| Breaker | Semi-auto shotgun with light armor penetration, tight spread and high rate of fire. Deals ~20% less damage per shot than Punisher. | A-- | Compared to Punisher, Breaker's tight spread and slightly lower damage mean you have to be more accurate to get one shot kills on low tier bugs, but longer effective range and high rate of fire mean that a skilled user can kill enemies quicker with a Breaker than with a Punisher. More demanding overall, but potentially more effective in skilled hands. | |
| Bone Snapper Armor | 100 armor rating with Med Kit - increases Stim duration and Stim carrying capacity. | N/A | Med Kit passive is good for surviving longer, but actual defensive passives (Extra Padding / Democracy Protects / Fortified) allow you to survive more extreme situations, which is consistently more useful overall. | |
| Booster: Vitality Enhancement | Reduces damage taken by 20%. | S+++ | Always use this. | |
| Image | Page 5 - Item | Description | Grade | Comment |
| Scythe | Laser beam rifle with light armor penetration and low damage per second. Sets enemies on fire. Has a noticeable firing delay, but no recoil. As an energy weapon, it uses a heat mechanic instead of ammo, so as long as you don't overheat it, you can shoot forever. If you do overheat, you have to "reload" it, which you can do a limited number of times, same as a conventional weapon. | D | Deeply underwhelming weapon that struggles engaging anything other than low-tier enemies. Low DPS and lack of stopping power make it ineffective against bugs, and lack of zoom options and tendency of the laser to obscure what you're shooting at make it bad against bots. A lot of the weapon's power budget seems to be in its "infinite" ammo, which is not nearly as useful as you might think. Helldivers 2 is not a game about attrition, it's a game about killing enemies quickly before they can overwhelm you. | |
| Impact Grenade | A variant of High Explosive grenade that deals half the damage, but explodes on impact, which makes it easier to hit specific enemies with, and increases their max throw range - grenades with a fuse harmlessly explode mid-air if thrown far enough. Highly effective against Scout Striders and Spewers, and can even destroy Tanks if a few of these are thrown at the rear of the turret. | B | Grenades that explode on impact are harder to use against bot Fabricators and bug holes, and they must be used carefully around bugs that can jump, as they will sometimes jump in front of you, get hit by the grenade, and make you kill yourself with the explosion. However, it also makes easy hitting vents on bot structures, or hitting specific enemies - or specific locations on enemies. For example, a few of these can be thrown at the cargo bay doors on the belly of a Factory Strider to kill it quickly. Or finish off a wounded Bile Titan. Not something you can easily do with an HE grenade. Not having to worry about rolling on sloped surfaces is also nice. Still, both have merits and choice between the two comes down to personal preference and the rest of the loadout. | |
| Hero of the Federation Armor | 100 armor rating with Democracy Protects - gives a 50% chance to not die upon taking lethal damage. | N/A | The only armor passive that will allow you to (sometimes) survive otherwise instantly lethal situations, such as getting hit by a tank cannon. | |
| Image | Page 6 - Item | Description | Grade | Comment |
| Liberator Penetrator | A variant of Liberator with medium armor penetration and slightly more recoil. Deals less raw damage per shot, which means ~15% lower DPS against unarmored targets, but higher penetration means ~32% higher DPS against light armor, and being able to penetrate medium armor at all is an undeniable advantage. | A | Some enemies are really tough to kill without having medium armor penetration, and it makes killing most other enemies easier as well. Overall a decent weapon against bugs. The DPS is pretty low, but it's easy to hold on target. Usable against bots, but assault rifles in general don't do well there. | |
| Battle Master Armor | 150 armor rating with Fortified. | N/A | ||
| Booster: UAV Recon | Increases radar range. | F | Nuclear Radar ship upgrade is more than enough to spot patrols. | |
| Image | Page 7 - Item | Description | Grade | Comment |
| Diligence Counter Sniper (DCS) | Sniper rifle with medium armor penetration, good damage, high rate of fire and low recoil. It has worse handling than Diligence Marksman Rifle, and noticeably benefits from Peak Physique armor passive. Can be fired from the hip pretty well. | S | Current champion of bot missions. Oneshots Devastators on headshots and most infantry bots on body shots. Kills Reinforced Scout Striders in a few shots to the crotch. Can delete an entire patrol from very long range in a few clicks. In a pinch can power through Devastators and Berskerkers with body shots. A truly terrifying weapon for a skilled shooter. Remains decent against bugs, though you may need Peak Physique in order to make it easier to hit smaller, more mobile bugs, and there's little reason to pick it over other med pen options. | |
| Trailblazer Scout Armor | 50 armor rating with Scout. | N/A | ||
| Booster: Stamina Enhancement | Increases stamina capacity and regeneration rate. | S | Always take this for missions where you need to move. | |
| Image | Page 8 - Item | Description | Grade | Comment |
| Slugger | A Punisher variant that fires medium armor penetrating slugs rather than buckshot. Same as Punisher, heavily staggers enemies on each shot. | B | As a single bullet weapon, it is harder to use against smaller, more mobile targets, but higher penetration makes it much more effective against mid-tier targets. Overall, similar in use and purpose to Dominator, but worse in every way other than handling. Tends to run out of ammo quickly and takes too long to kill. | |
| Combat Technician Armor | 100 armor rating with Scout. | N/A | ||
| Smoke Grenade | Utility grenade for breaking line of sight with enemies. Effectively makes enemies forget about seeing you, so good for stealth and avoidance. Or at least so says the one helldiver that uses them. | D | Might be worth bringing for solo stealth play? | |
| Image | Page 9 - Item | Description | Grade | Comment |
| Breaker Spray & Pray | A Breaker variant with heavier handling, bigger magazine and 10% higher rate of fire. Fires a larger amount of weaker pellets in a wide horizontal pattern, dealing roughly ~28% lower damage per shot than Breaker, and ~20% lower DPS with ~18% higher damage per mag and ~33% higher amount of total carried damage (spare ammo). | D | Heavy handling is awful here, and makes snap aiming in close quarters impossible. Unless you compensate for the heavy handling with Peak Physique, the only real use of the weapon is firing it at full auto at a group of bugs while sweeping it side to side like a lead-spewing hose. It can't do even that reasonably well, because when bugs start jumping at you, defending yourself with Breaker SNP in close quarters will be difficult. Even if you do get Peak Physique, Breaker SNP at best is a sidegrade to regular Breaker, trading range and damage for ammo capacity and ease of inflicting some damage. A bad trade overall. | |
| Physician Armor | 100 armor rating with Med Kit. | N/A | ||
| Booster: Muscle Enhancement | Reduces the strength of slowing effects on you, both from enemies and from rough terrain or weather effects. | A | More or less mandatory on snowy planets, and a good filler against bugs. Contrary to what you might think, doesn't make you better at climbing or jumping. | |
| Image | Page 10 - Item | Description | Grade | Comment |
| Scorcher | Semi auto plasma rifle with light armor penetration that also deals explosive damage with medium armor penetration. Has no recoil, can be switched into a full-auto mode. Does not consistently oneshot all low-tier units, but it is spammable and easy to handle. It can kill Scout Striders and Heavy Devastators through the frontal shield, but not the Reinforced variant. Deals good damage to vents on bot units and turrets. Explosive damage will hit you as well if you're too close. | S | Scorcher performs well against bots, being a versatile and easy to handle weapon. It struggles hitting weakpoints, but can fire quickly enough that it's not a big deal. Not a lot of primaries are able to overpower a Heavy Devastator right through the shield. It's not unusable against bugs, but it doesn't reliably oneshot Hunters, and in general you'll need to reload quite more often. | |
| Booster: Increased Reinforcement Budget | Increases total amount of reinforcements by 4. | D | If you can't do something in 20 reinforcements, you probably won't be able to do it in 24. Okay filler when you're learning to play on higher difficulties. | |
| Champion of the People Armor | 100 armor rating with Democracy Protects. | N/A |
Super Citizen Edition
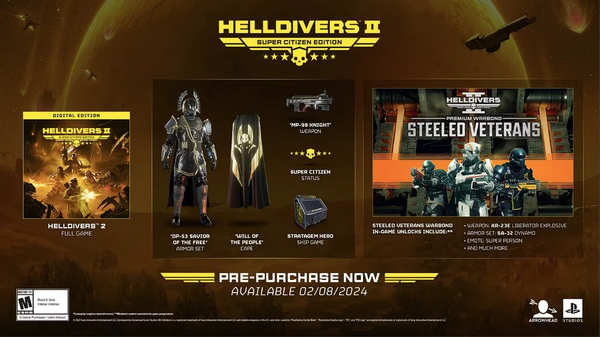
The Super Citizen edition of the game includes Steeled Veterans warbond, Stratagem Hero minigame, some cosmetics, and the following gear:
| Image | Item | Description | Grade | Comment |
|---|---|---|---|---|
| Knight | One-handed SMG with light armor penetration and crazy high rate of fire. | B | Essentially a Redeemer with delusions of grandeur, Knight kills enemies fast, but high rate of fire and high recoil make it difficult to use. It fires so fast that it tends to waste a lot of ammo overkilling enemies, unless fired in short bursts, which you will need to do anyway in order to hit anything. Kills Alpha Commanders in about half a mag, which takes about a second of shooting. Overall an interesting alternative to basic Liberator against bugs. | |
| Savior of the Free Armor | 100 armor rating with Democracy Protects. | 0 |
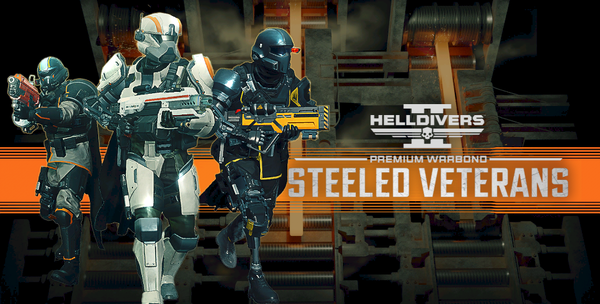
Steeled Veterans
This warbond is granted "for free" if you purchase the Super Citizen edition of the game, which also gets you some other exclusive goodies mentioned above.
| Image | Item | Description | Grade | Comment |
|---|---|---|---|---|
| Liberator Concussive | "Crowd control" Liberator variant that deals less damage, fires 50% slower, but has very strong pushback and increased magazine size. | D | It works well as a pure crowd control tool, but struggles to actually kill anything. If you want a weapon that will help you protect your squadmates against advancing bugs, Sterilizer support weapon is the premium choice, though even the Punisher is a better pick overall, as at least it actually kills stuff. | |
| Breaker Incendiary | An incendiary variant of the Breaker shotgun. The incendiary effect means even grazing hits against low-tier bugs and Shriekers are usually lethal, and high rate of fire and spacious magazine give you enough firepower to chew through multiple Alpha Commanders or Stalkers before needing to reload. In a pinch can kill a Bile Spewer by shooting their bile sac. | S- | Mostly a direct upgrade to Pray & Spray and regular Breaker. One of the best primaries against bugs. Keep in mind that burning enemies can set you on fire when they attack you, though. Notable downside is carrying fewer spare magazines, so some trigger discipline is required. Another downside is lack of stopping power against Alpha Commanders. Sure you can decapitate them at close range, but they will still charge and kill you, if you're not careful. | |
| Dominator | A heavy semi auto weapon that fires rocket-propelled projectiles with medium armor penetration and heavy stagger. Oneshots low-tier enemies. Devastators are killed in one headshot or in a few bodyshots. Mid-tier bugs are killed in a few headshots. | A+ | Despite heavy handling and slow projectiles, it's one of the best primary weapons in the game. Against bots, it's a versatile weapon that can handle almost any target, and is especially effective against Devastators. With cover, you can take time to line up headshots, but in a pinch, body shots will stunlock and kill them reasonably quickly. Against bugs, it specializes in mid-tier targets, such as Alpha Commanders and Bile Spewers. The Peak Physique armor passive is recommended to improve handling. | |
| Senator | A ridiculously powerful revolver with heavy armor penetration. Kills Devastators in one headshot, and Infantry bots on a body shot. Oneshots low-tier bugs, mid-tier bugs are killed in a few headshots. Heavy armor penetration allows to damage even Hulks and Chargers. It's not gonna be great against Chargers, but it can kill Hulks in a few headshots. Has a rather slow rounds reload, but reloads much faster if fully empty. | S | Can be difficult to aim, especially against smaller and mobile targets in close quarters, but sheer power is hard to overstate. Heavy armor penetration is a bit excessive, as with the exception of headshotting Hulks, Senator isn't really going to do much against heavily armored enemies, but it does allow to deal more damage against enemies with medium armor. Tip: ignore the terrible triangular crosshair and use the small circle to aim. | |
| Incendiary Grenade | A grenade that deals a relatively small amount of explosive damage with medium armor penetration and lights the ground and nearby enemies on fire when it explodes. Has a shorter fuse, and if thrown too far, it will explode mid-air, fizzling out and not doing anything at all, so your max throw range is somewhat limited. | A | Excellent tool against bugs, most effective when thrown on top of a bug breach, killing all nearby low-tier enemies, and further low-tier enemies that will crawl out of the breach while the ground is burning. Mid-tier enemies survive the fire, but become easier to kill via other means. | |
| Booster: Flexible Reinforcement Budget | Reduces time until new reinforcements are granted once they've been depleted by 10%. | F | Almost never comes into play, and even then barely does anything. Hard pass. | |
| Armor | 100 and 150 armor rating armors with Servo Assisted - increases limb health and throw range of grenades and stratagems. | 2 | Servo Assisted is not a meta passive, but can be contextually useful, like on missions where you need to take out automaton Command Bunkers or other stationary assets. |
Total score: S, very good warbond. Has a little bit of everything and is worth getting for Senator or Breaker Incendiary alone.
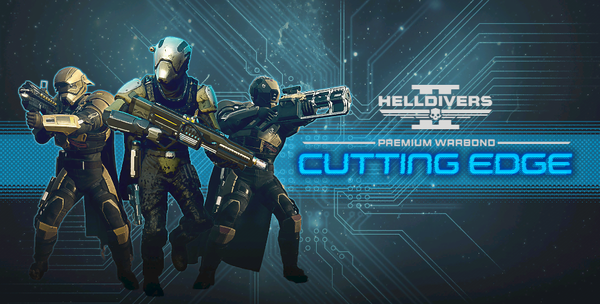
Cutting Edge
| Image | Item | Description | Grade | Comment |
|---|---|---|---|---|
| Sickle | LMG-like automatic energy weapon with light armor penetration, a short firing delay and poor accuracy, but nearly no recoil. Same as other energy weapons, uses a heat mechanic rather than ammo, and can fire indefinitely as long as you don't overheat. It takes a lot of shots to overheat, and if fully overheated, swapping a heatsink takes very little time. To summarize, Sickle has the longest sustained fire among assault rifles, though the DPS is relatively low. | B+ | Light armor penetration is a big downside you will have to deal with. Still, a strong option against terminids, as due to "infinite" ammo you can help your squad conserve ammo by thinning out bug hordes and picking off stragglers. Bad pick against bots due to poor accuracy. | |
| Punisher Plasma | A pump action plasma grenade launcher. Deals area damage and staggers all enemies it hits. Oneshots infantry bots with area damage, makes short work of Scout Striders, but Devastators and Berserkers take a lot of hits to kill. Has short range and can be difficult to use, but being able to stagger multiple Devastators or Berserkers at once is impressive for a primary. | B | Main drawback of this weapon is low killing power. It takes forever to kill mid-tier enemies, and - on the bug front - very annoying to use against low-tier enemies. Staggering multiple mid-tier enemies at once is nice, but it doesn't have the ammo economy to be a sustained suppression tool. | |
| Arc Blitzer | Lightning arc shotgun-like weapon with medium armor penetration, infinite ammo and no reloading. Short range, decent damage. Blitzer's hits stagger enemies, and eventually stun them. | S | An extremely powerful weapon against bugs, as its reasonably effective against both low-tier and mid-tier enemies. It takes a while to kill, but since it has infinite ammo and doesn't require reloading, you can keep kiting the horde until you eventually thin it out. You do need to keep moving to keep killing effectively, because corpses will absorb Blitzer's shots. Tends to arc unpredictably, so it must be used carefully around allies. Overall, a perfect weapon for a loner or a vanguard. Not effective against bots due to short range. | |
| Dagger | Essentially a pistol version of the Scythe, Dagger is a laser beam energy secondary weapon with light armor penetration. The laser beam sets enemies on fire and can be used to aim the weapon on the move. Same as Scythe, uses the heat mechanic instead of ammo, and can potentially fire indefinitely, as long as you don't overheat. | C | Dagger has no stopping power, but it does have "infinite" ammo and mobility. You can fire at enemies as you run away from them, using the laser beam to aim. It's reasonably capable against low-tier enemies, and probably the best sidearm to use against Shriekers, but that's about it. | |
| Stun Grenade | Utility grenade. Stuns Hulks, Chargers, and everything smaller. Can be used to make them easier to hit weapons or stratagems, or just to give yourself some breathing room. Does nothing to Tanks and other massive enemies, cannot destroy Fabricators / close bug holes. Limited throw range due to short fuse. | A | Mostly used in combination with specific weapons, e.g. Flamethrower vs Spewers and Chargers or Autocannon / Anti-Materiel Rifle vs Hulks. Safe to use around allies, as it only slows them down and drains their stamina. | |
| Booster: Localization Confusion | Increases the cooldown of enemy reinforcements - bots calling for dropships and bugs calling for breaches. | A | Useful on 40 minute missions to reduce the amount of reinforcements you have to deal with. | |
| Armor | 50 and 100 armor rating armors with 95% resistance to Arc damage. | 2 | Not useful for meta gameplay, though one can imagine a squad of four people running Blitzers and Arc Throwers using this armor and moving around as a tight group, firing lightning in all directions. |
Total score: A, okay warbond. The booster is useful and Blitzer is a meta primary against bugs. Other stuff is not terrible either, but not meta.
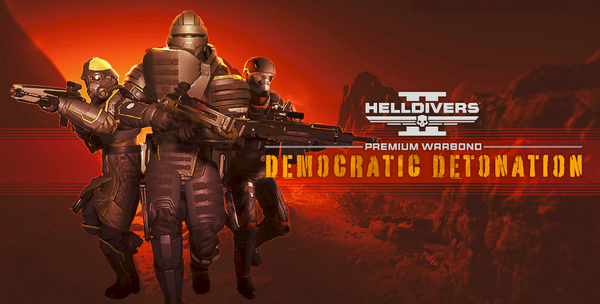
Democratic Detonation
| Image | Item | Description | Grade | Comment |
|---|---|---|---|---|
| Adjudicator | A medium armor penetrating assault rifle with high DPS and high recoil. Lovingly dubbed "Judy" by the community. | S | A highly versatile weapon against bugs, where its high DPS and penetration allow it to handle all low-tier and mid-tier bugs, and high recoil doesn't really matter, especially when reduced by Engineering Kit, which is the meta passive anyway. Decent against bots, but inferior to Diligence CS there. | |
| Eruptor | A heavy bolt action rifle. Fires high-caliber rounds that explode on contact, dealing medium armor penetrating area damage, and disperse light armor penetrating shrapnel. Can close bug holes and destroy bot Fabricators. Has painfully heavy handling and low rate of fire, but the area damage and shrapnel typically make each shot a multi-kill. Particularly effective against Nursing Spewers (oneshot above the head) and Bile Spewers (two-shot anywhere). Often requires three direct hits to kill Heavy Devastators, and two hits to kill Reinforced Scout Striders, which makes this weapon pretty weak against bots outside of Evacuate High Value Assets missions. Alpha Commanders similarly require three direct headshots most of the time. | A | Will kill or ragdoll you or your allies if used at close range, so carry a good sidearm and be always ready to switch to it. Peak Physique armor passive will improve handling, but the gun will still be sluggish. Try to reload it with at least one round remaining, as the reload from fully empty is punishingly long. Eruptor is most effective against tight groups of enemies, but struggles against individual lone enemies: low-tier enemies can be difficult to hit, and most mid-tier enemies require multiple direct hits to kill. | |
| Exploding Crossbow | Fires explosive bolts that deal medium armor penetrating area damage. Can close bug holes and destroy bot Fabricators. A lighter alternative to the Eruptor, with shorter range and lower area damage, but lighter handling and higher rate of fire. The shot itself is nearly inaudible to enemies, which might be useful for stealthy gameplay. Can be used one-handed. Two-shots Devastators anywhere on the body. | S-- | The crossbow has a combination of annoying traits: low rate of fire, firing delay, small magazine, slow and difficult to see projectiles affected by gravity, explosive damage that will ragdoll or kill you if you fire it too close. But a skilled user who can work around these difficulties will be rewarded with supreme killing power. Compared to Eruptor, Crossbow is safer to use around allies and is more consistent due to not having randomly distributed shrapnel, and it needs consistently fewer shots against some enemies. | |
| Grenade Pistol | A pistol that fires grenades that deal medium armor penetrating area damage. Must be reloaded after each shot. Can destroy Fabricators and close bug holes, and is mostly used for that specific utility. Needs two shots to blow up Spewers. | A | Damage is good for a secondary, but you're not gonna be slaying hordes of enemies with it. Can be tricky to aim and the ammo economy isn't great. Overall it's more of a utility item than a sidearm. | |
| Thermite Grenade | A single-target grenade that sticks to an enemy, and deals heavy armor penetrating damage over time and then explodes. Capable of killing heavily armored units all on its own, even the massive ones. Must be attached to the target to deal damage effectively. One of these can kill a Hulk, a Tank or a Charger. Two can kill a Factory Strider or a Bile Titan if attached to the head. Can also destroy bot Fabricators if attached to them anywhere. Can close bug holes too, but must be thrown down the hole, which can be tricky to do, since it will stick to walls. Carrying capacity for these is reduced by 1. | S | An extremely powerful option, especially for loadouts that do not use dedicated support weapons for killing heavy enemies. Can be tricky to use, since you need to be very accurate with your throws, and heavy enemies are typically very dangerous up close. It also takes a while to explode, leaving the enemy free to attack in the meantime. | |
| Booster: Expert Extraction Pilot | Reduces time it takes for evac shuttle to arrive by 15%. | F | ||
| Armor | 64, 100 armor rating armor with Engineering Kit, 150 rating armor with Fortified. | 2 | Engineering Kit is currently meta for bug missions, but you can get 100 armor rating armor with Engineering Kit from the free warbond. |
Total score: Easily S-tier warbond, with a ton of unique utility that is not available anywhere else, every item in the warbond is a banger in their own right. Except the booster, which is useless.
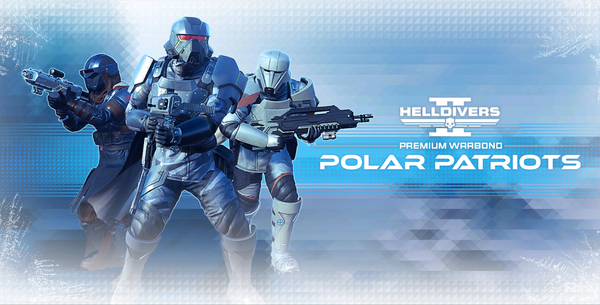
Polar Patriots
| Image | Item | Description | Grade | Comment |
|---|---|---|---|---|
| Tenderizer | Light armor penetrating assault rifle with high damage per shot and nearly no recoil. By default, fires slightly slower than stock Liberator, but still deals ~27% more DPS due to higher damage per shot. Can be switched into a firemode with higher rate of fire, which skyrockets the DPS to ridiculous levels. | A++ | Excellent for bursting down low-tier bugs and lightly armored mid-tier bugs. In 850 RPM firemode, deals more DPS than Adjudicator even against lightly armored targets, and Tenderizer is easier to hold on target, and can go full auto where Judy would have to burst fire. The shooter must exercise trigger disciple to avoid wasting too much ammo on overkilling enemies. Most bugs require only a short burst. Having no medium armor pen ultimately hurts this weapon's viability very much, but if you're satisfied with light pen, Tenderizer is the best light pen AR, hands down. | |
| Pummeler | A low DPS, slow-firing light-armor penetrating SMG that stuns enemies if you shoot them long enough. Bigger targets require more shots to stun. Essentially a concussive variant of the Defender. Pummeler's stun is less immediate than Liberator Concussive's pushback, but generally more useful, because pushback makes enemies harder to hit, while stun keeps them in place. | D | Deeply underwhelming weapon. The stun is nice, but takes too long to accumulate on enemies where it actually matters, and there are weapons that can just kill faster than this thing stuns. | |
| Purifier | A plasma rifle, similar to Scorcher. Fires projectiles that deal medium armor penetrating damage on impact, and produce an explosion that deals a small amount of medium armor penetrating area damage. Shots can be charged, which increases the damage of the main projectile, and at full charge - which takes 1 second - the damage, radius and stagger force of the explosion are increased considerably. Kills Devastators in a few fully charged shots. However, even uncharged shots deal more damage than Scorcher to light and medium armored targets due to higher penetration. Purifier doesn't have auto fire, but it can be fired almost as fast as you can click. | S | Essentially an upgrade to Scorcher. Deals more damage to most targets and can potentially fire faster, but at the cost of having less ammo. Charged shots are very ammo efficient, though. Be careful about firing charged shots in close quarters, as the explosion will deal a ton of damage to you as well. | |
| Verdict | Fast-firing semi auto pistol with medium armor penetration and relatively high damage per shot. Essentially a souped up version of the Peacemaker, the default pistol. Takes 1-2 shots to kill bot infantry and low-tier bugs, Devastators require one headshot. | S | An excellent general-purpose sidearm, simple and effective. Has the best qualities of Redeemer (high DPS) and Senator (higher penetration, high damage per shot). The clear winner of "I just want a simple backup weapon" contest. | |
| Incendiary Impact Grenade | An alternative to regular Incendiary Grenades. Explodes on impact, so has no risk of exploding mid-air when doing a long-range throw, and basically is a direct upgrade in that respect. The explosion itself deals half the damage, but it doesn't really matter for this kind of grenade. | S | Be careful using these around Hunters and other jumping bugs. Closing bug holes can also be a bit tricky. Still, it's hard to overstate sheer killing power of this grenade against low-tier bugs. Just throwing one of these is enough to neutralize most of low-tier enemies in a patrol or a bug breach. | |
| Booster: Motivational Shocks | Reduces the duration of slowing effects by 25%. | D | Better than nothing, but not worth bringing over the meta boosters. The Muscle Enhancement booster reduces the strength of the slowing effects and makes you faster on rough terrain, so most of the time you would bring that one instead. | |
| Armor | 150 armor rating Servo Assisted, 150 rating Fortified, 50 rating Scout. You can get the last two combinations from the free warbond. | 1 |
Total score: A+. Excellent warbond.
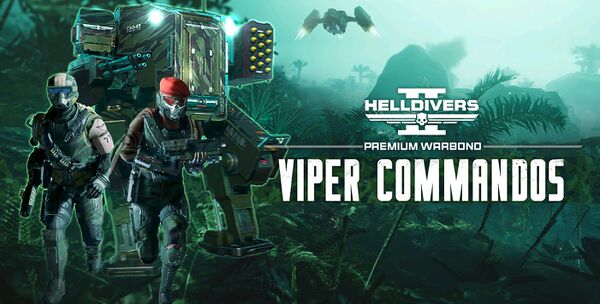
Viper Commandos
| Image | Item | Description | Grade | Comment |
|---|---|---|---|---|
| Liberator Carbine | A variant of the Liberator with 50% higher rate of fire, more recoil and no scope zoom options, and slightly faster reload if fully empty. | B- | Technically a direct upgrade to basic Liberator on bug missions, if the shooter has some trigger disciple and can avoid wasting ammo by overkilling enemies. However, it's inferior to Tenderizer, which deals more DPS in high RPM mode and gets better optics and massively better accuracy, and is less prone to overkills due to lower rate of fire. | |
| Bushwhacker | A triple-barrel sawed-off shotgun secondary. Deals good damage with strong pushback on each shot, with surprisingly long effective range against low-tier enemies and quick rounds reload. On a lucky headshot, can oneshot Berserkers, Devastators and Stalkers. Can fire all three barrels at once, which increases the reliability of the "oneshot" kill, and allows to oneshot headshot Brood Commanders and Alpha Commanders, though the latter requires a very good hit. Good amount of spare ammo. | A | A pocket "screw you in particular" handcannon and a good option for self-defense in close quarters thanks to pushback, particularly against fast-moving Alpha Warriors and Alpha Commanders, as well as Berserkers. Makes a good companion to primaries with low stopping power, like Torcher. Requires a bit more conscious aiming than Redeemer, but a bit less than Senator. | |
| Throwing Knife | A throwing knife that is carried in the grenade slot. Cannot be picked up, cannot be used for melee. The throw is silent, so it has some stealth applications. Difficult to aim. Deals good damage with medium armor penetration, but not enough to oneshot mid-tier bugs. Penetrates Energy Shields. Carrying capacity is significantly increased, so you can really go to town throwing these. | D | To use these, you have to give up grenades, and all you get in return is sometimes being able to deal damage at close range to one enemy. This is a very bad trade almost always. That said, throwing knives can serve as a pseudo sidearm for self-defense in close quarters. | |
| Booster: Experimental Infusion | Stims increase your movement speed by 15% and provide 15% damage resistance. Applies to the stim effect from the Stim Pistol. | S- | Reasonably strong booster that allows you to sometimes survive otherwise lethal situations, or just traverse the map faster. | |
| Armor | 50 and 150 armor rating with Peak Physique - improves weapon handling and melee damage. | 2 | The melee damage bonus is not a game changer, but the handling improvement is huge, especially useful with single shot precision weapons, like Autocannon, AMR, Dominator, Diligence CS, though it helps heavy support weapons as well, like the Machinegun, Heavy Machinegun, Recoilless Rifle and even the Flamethrower. You can also get 100 armor rating with Peak Physique from the premium shop, so you don't need the warbond if you just want the passive. |
Total score: B+. Small warbond. Peak Physique armor is great, but you can get it from Super Store. Experimental Stims is nice, and very popular in the community, but only one of four players in the squad needs to have it, so usually you will be covered there. Bushwhacker is a nice addition for very specific loadouts.
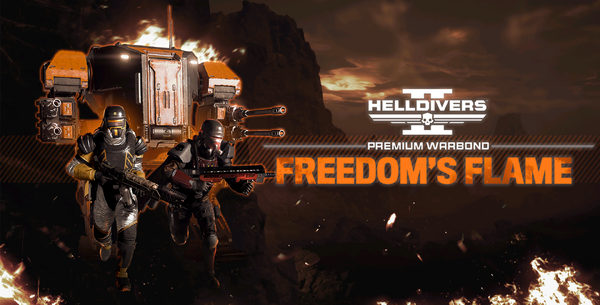
Freedom's Flame
A warbond with a lot of incendiary items. Let's briefly cover how burning works. The burning status effect deals damage over time with heavy armor penetration to the target's "main" health pool. Most mid-tier enemies have "main" health pool large enough that the burn effect alone would take a very long time to kill them. Most enemies are efficiently killed by shooting them in specific weakpoints, which is usually the head. Shooting the head with an incendiary weapon will deal damage to the head, but the burn effect will be applied to the target's "main" health pool, so effectively your damage will be split between the two locations. If you end up killing the target by shooting the head, the burn damage is effectively wasted. So as a summary, while burning is capable of damaging Hulks, Chargers, and everything smaller, the burn damage is usually wasted on mid-tier and Heavy enemies, because their "main" health pool is so big that killing them with burning alone is just impractical.
Flamethrower-type weapons fire a stream of fire that deals damage to whatever body part it hits, so firing a weapon like that at e.g. an Alpha Commander's head, you'll still destroy the head reasonably quickly. Additionally, flamethrowers if aimed low enough will set the ground on fire, which will ignite any unit if they walk over it. So if you're retreating and firing at advancing enemies, aim low to ignite the ground and make enemies walk over the burning ground. If you're advancing, aim higher, so you don't ignite the ground, and risk setting yourself or your allies on fire. Though Flametherowers make poor advancing weapons due to lack of stopping power.
Weapons that fire incendiary projectiles, such as Breaker Incendiary, deal their direct damage to whichever location they hit, and set the enemy on fire, dealing burn damage to their "main" health pool.
Burning does not disable or otherwise "discourage" enemies in any way, so they will keep attacking if they can. Burning enemies that attack you in melee have a chance to set you on fire as well.
| Image | Item | Description | Grade | Comment |
|---|---|---|---|---|
| Cookout | Incendiary Punisher. Same stagger and pushback as regular Punisher, but trades immediate damage and projectile velocity for incendiary effect, which makes it very effective against low-tier bugs, as even a grazing hit is enough for them to burn to death. Due to low Durable damage, Cookout needs a ton of shots to kill Alpha Commanders and Spewers. | B+ | A mix between Punisher and Incendiary Breaker. It can spray low-tier enemies and let them burn to death, but tends to run out of ammo if you do it too much. It can push Stalkers, Alpha Commanders and Alpha Warriors away to protect yourself and the squad, but takes forever to actually kill Alpha Commanders and Spewers. If the rest of your loadout compensates for its weaknesses, it can be an interesting pick. | |
| Torcher | Primary Flamethrower. Very similar to support weapon Flamethrower, but with less fuel per canister. | A+ | A good option for horde clearing, but on its own, lacks stopping power against mid-tier bugs. Becomes utterly terrifying if combined with Gas, which disorients enemies, allowing you to safely roast them. Dangerous to use around allies, and obviously weak against flying units, so must be combined with a good sidearm, such as the Verdict. | |
| Crisper | Sidearm Flamethrower. Very small amount of fuel per canister, but otherwise is similar in performance to Torcher. | A | Even though it burns through ammo quickly, the horde-killing potential is unrivaled for a sidearm, and since it's a one-handed weapon, it can be fired behind you as you run away, so it's good for kiting hordes onto ground you set on fire. Very poor for self defense due to lack of stopping power. | |
| Booster: Firebomb Hellpods | All hellpods, including supplies and equipment, cause an explosion upon landing. | D | This booster is extremely dangerous and should NEVER be used in matchmade groups. The entire squad must keep this booster in mind every time they call something down, or there will be teamkills. It has okay potential in organized groups, though. | |
| Armor | 50 and 100 armor rating with Inflammable - reduces fire damage by 75%. | 2 | Most common way of being set on fire is through sloppy use of flamethrower-type weapons, which can be mitigated by developing good habits, like not firing while diving and not walking directly forward while firing. Far from necessary, but does function well as training wheels. Also begs to be used on planets with Fire Tornadoes modifier. 100 and 150 armor rating with Inflammable are available in Super Store, so you don't need the warbond if you just want the passive. |
Total score: A-. Pretty strong bug-centric warbond for very specific playstyles and loadouts. Highly benefits from being combined with gear from Chemical Agents warbond.
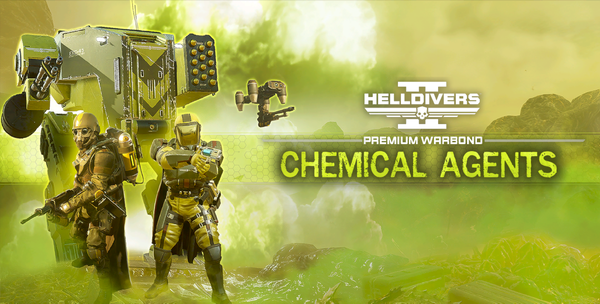
Chemical Agents
First warbond to feature new stratagems. It has a heavy accent on Gas, so let's cover how it works: Gas is a status effect similar to burning. It deals less damage over time, but has armor higher penetration, and is able to damage all units, even those with tank-level armor. The damage isn't high, but it's usually enough to kill low-tier enemies. In addition, the Gas confuses enemies, slowing them, and forcing them to move and attack in random directions, which sometimes leads to enemies attacking each other. The confusion effect applies to Chargers, Hulks, and everything smaller, but not to Tanks, Factory Striders or Bile Titans. It's an extremely potent status effect, effectively being a better Stun. Units can be burning and gassed at the same time, taking damage from both effects.
| Image | Item | Description | Grade | Comment |
|---|---|---|---|---|
| Sterilizer | A Flamethrower-like support weapon that produces a stream of toxic Gas. The Gas does not linger, and the Gas status effect lasts on enemies for only a few seconds, so to keep enemies confused and taking damage, you have to keep reapplying the debuff, spraying them every few seconds. Unlike the Flamethrower, Sterilizer fires immediately, as it doesn't have a pilot light that needs to be ignited before it can start shooting. Has a surprisingly long range of ~45m. | A | While the weapon itself deals very little damage, it's an amazing crowd control tool that can keep enemies confused while they are getting torn apart by your allies. It also makes an interesting combo with the Torcher primary flamethrower. By juggling the two weapons, you can keep enemies confused, burning and gassed at the same time, which also resolves the Torcher's weakness against mid-tier units: it kills them fine, but usually not quickly enough to prevent them from attacking. | |
| “Guard Dog” Dog Breath | A backpack that gives you the company of a drone that sprays a nearby enemy with Gas, similar to a very short-range Sterilizer. The drone sprays enemies one at a time, switching targets only when it runs out of fuel, the target dies, or leaves the drone's range. The drone returns to the backpack to refuel as needed. The fuel storage in the backpack seems to be infinite. Similar to other Guard Dogs, the drone's flight height is controlled by player's vertical aim: aiming upwards lifts the drone higher, aiming downwards keeps it closer to the ground. This is useful for other Guard Dogs, but for this one it creates a huge mechanical issue: unless you aim low, the Gas spray will not hit small enemies, like Hunters and Scavengers. The drone will just shoot above them, wasting the Gas. | F | Expectation: protects you against enemies at close range by spraying them with Gas to keep them nice and disabled while you shoot or burn them. Reality: the drone doesn't begin spraying anything until enemies are already on top of you, at which point it will keep gassing one enemy, while the rest of the bug horde rips you to shreds, and even that enemy is usually one Hunter, and the drone just keeps shooting above it, wasting Gas. Or it's a Charger, and the drone will keep him Gassed for a few seconds, and then the Charger will charge you while the drone returns to refuel. Conclusion: waste of the stratagem and backpack slots. | |
| Stim Pistol | A utility pistol that applies a short Stim effect on hit, restoring allies' Health and Stamina. The Stim effect is affected by Experimental Infusion booster. Has a good supply of ammo. Darts don't go through Energy Shields. It doesn't seem to be possible to hit yourself with it. | C | Most players habitually use their own Stims the moment they take damage, so bringing the Stim Pistol into matchmaking is usually a wasted effort, but it can be an interesting option in organized squads with voice comms, where you can communicate to other players to not waste their stims and stay still, making it easier to hit the darts. Healing wounded allies in the heat of combat as they run around and dive and dodge enemy fire isn't really going to work, but Stim Pistol can still be useful to top off wounded allies between fights. It can also help allies move around the map by restoring their stamina, which is especially useful for heavy armor users, and on planets with Intense Heat modifier, especially if combined with Experimental Infusion booster. | |
| Gas Grenade | A grenade that produces a lingering cloud of toxic Gas. The initial detonation does not deal any damage, and this grenade cannot destroy bot Fabricators or close bug holes. | S | An extremely powerful grenade that combines the best features of Stun and Incendiary grenades. If thrown on top of a bug breach, it will kill most low-tier enemies that emerge from the breach, and soften up mid-tier enemies, and slow their advance. Can also be used as a "get off me" card, thrown behind yourself as you run away from enemies, or to keep a patrol in place while you throw an offensive stratagem on their heads. Helldivers take relatively little damage from Gas, so it's reasonably safe to throw behind retreating allies as well. | |
| Armor | 50 and 100 armor rating with Advanced Filtration - reduces gas damage by 80%. | 2 | Advanced Filtration is relatively useless to the gas user themselves, but it might be helpful to a fellow Flamethrower user, if you want to try forming a dynamic duo of Flamethrower + Sterilizer. 100 and 150 armor rating armors with Advanced Filtration are available in Super Store. |
Total score: B. The Gas Grenade is meta, especially on bug missions, and Sterilizer is great if you enjoy the specific playstyle it offers, but the rest of the warbond is pretty underwhelming.

